Using Meeting Notes
Meeting Notes records or imports audio and video, transcribes it on your own machine, and — if you want — turns the transcript into a structured summary with the key decisions. Meeting recordings are some of the most sensitive data an organization has; cloud transcription services stream that audio off-device. Here, the speech recognition runs locally, so no audio ever leaves your machine.
When to use it
- A client interview — record through the laptop mic, then get a transcript with speaker labels, a summary, and the decisions to archive with the case file.
- A board recap — import the recording of a one-hour meeting and get a decisions-focused summary suitable for the minutes.
- A sales call follow-up — record the call and send the recap the same afternoon, with no manual note-taking.
- Field research — batch-import a folder of interview recordings and get a transcript plus summary for each.
How to use it
- Open the Workflows view and choose Meeting Notes.
- Either import a file (MP3, WAV, MP4, M4A, WEBM) or start a live recording from your microphone.
- Set the options (see below): language, speaker count, and whether to add a summary and/or export.
- Run it — or, for a live recording, stop when the meeting ends. Transcription begins automatically.
Options
- Language — auto-detected by default; set it explicitly if you prefer.
- Speakers — Auto-detect, or pick a known count from 1 to 8+ to guide speaker labelling.
- Auto-summary — off by default. Turn it on to chain a summary (and a decisions section) after the transcript is produced. With it off, you get the transcript alone.
- Auto-export — off by default. Turn it on and choose a format — PDF, DOCX, or TXT — to save the result to your Settings export folder.
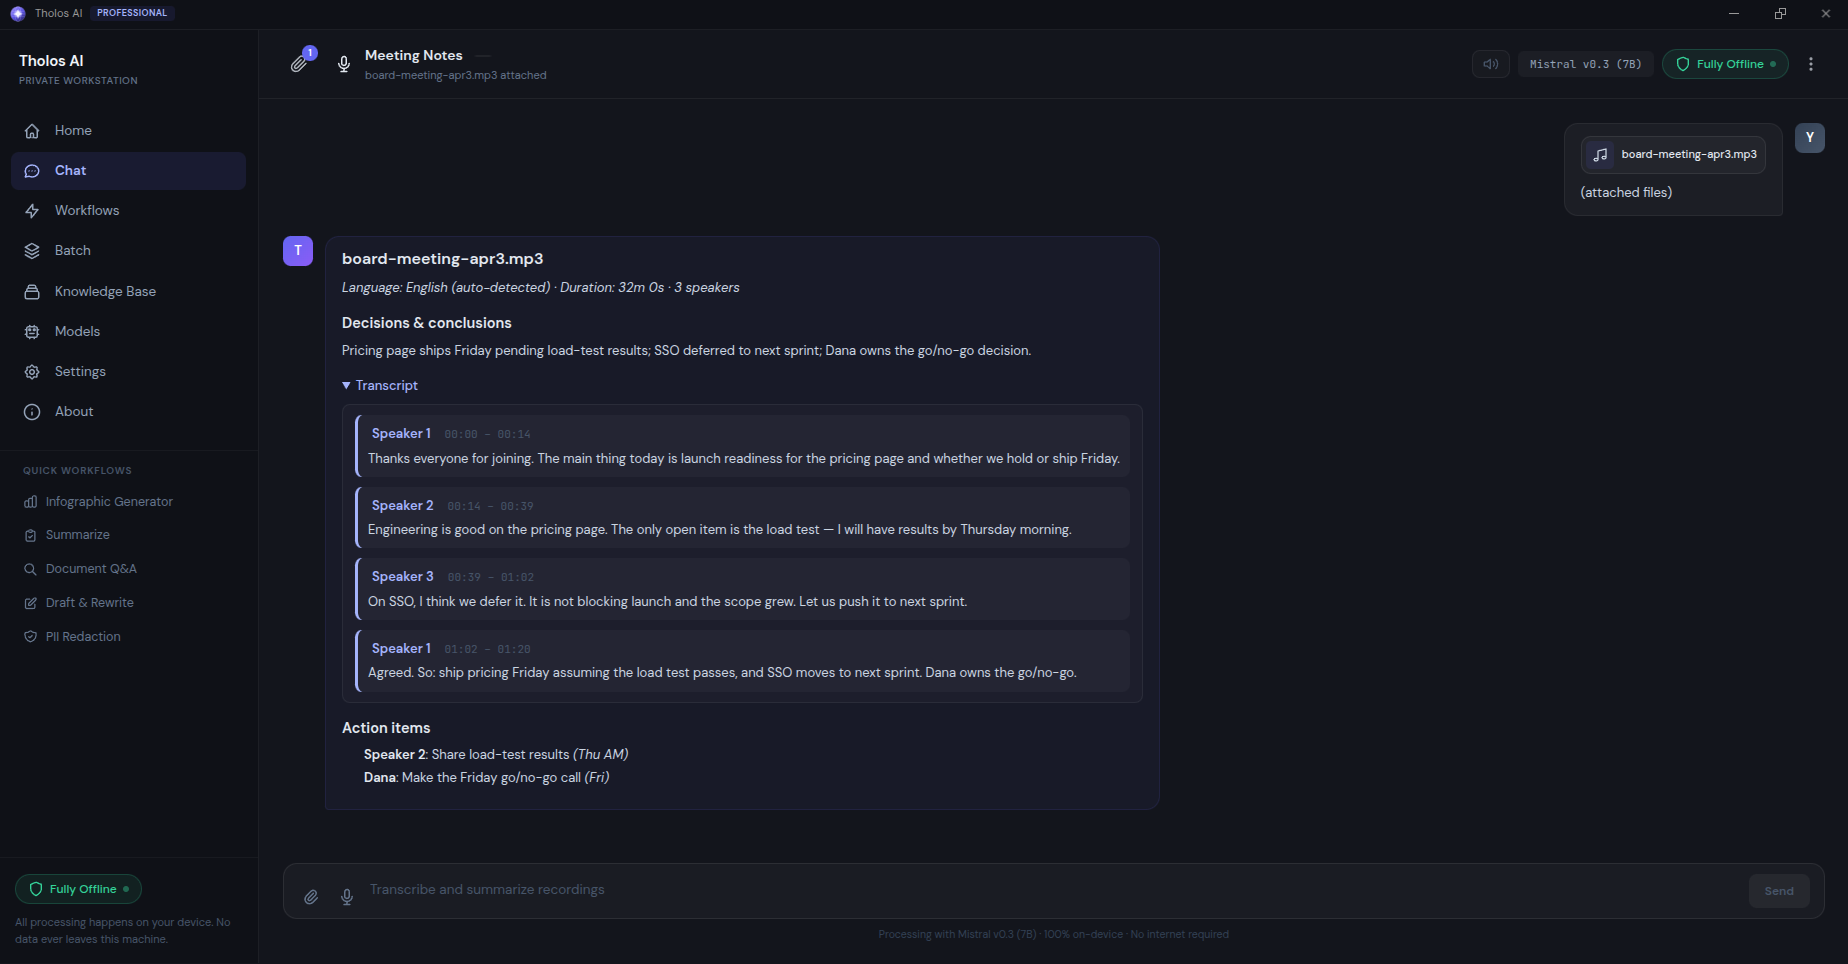
What you’ll see
- While recording: a microphone level meter, elapsed time, and a “Recording — Fully Offline” indicator the whole time.
- While transcribing: a progress bar showing processed N seconds of M.
- When done: a metadata strip (language, duration, speaker count), then a Summary and a Decisions & conclusions section (if you enabled auto-summary), and the full Transcript in a collapsible panel with timestamps and speaker labels.
Got many recordings? Stage them in the Batch Process view to transcribe a whole list of interviews in one unattended pass.
Checking the result
- Scan the transcript: timestamps should make sense (no large gaps), and speaker labels should stay stable across the meeting.
- Spot-check the summary against your own memory — every major decision should be reflected.
- If you recorded from the microphone, confirm the privacy badge stayed on “Fully Offline” throughout.
Tips
- Multilingual meetings (code-switching): pick a multilingual speech model in the Models view before you start — see Choosing the right AI model.
- Speaker labels are best-effort. For a verbatim record of exactly who said what, capture separate channels (one mic per speaker) where you can.